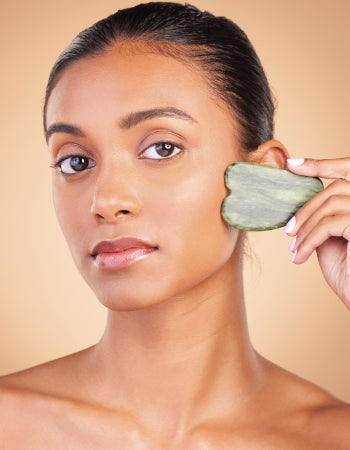
Is your Instagram feed flooded with smooth-edged tools and perfectly sculpted cheekbones? It seems like every influencer is swearing by Gua Sha for that effortlessly glowing skin. But with so many trends popping up faster than you can say "self-care," is Gua Sha truly the ancient Chinese beauty secret it claims to be, or just another passing fad?
Let’s look into the facts (and maybe even our cheekbones) to know if Gua Sha is the real deal.
What is a Gua Sha?
With so many advanced facial tools available in the market, Gua Sha, an old-school facial tool, has so many benefits for your skin. Gua Sha dates back over 2,000 years and is rooted in traditional Chinese medicine.
The term "Gua Sha" comes from the Chinese words "gua," meaning to scrape, and "sha," which refers to the redness that appears on the skin after scraping. This redness is believed to be a sign of improved circulation and the release of toxins.
How to Gua Sha correctly?
Before you start Gua Sha-ing your way to clear skin, remember that this is a technique that requires a little know-how. Too much pressure, or using the tool incorrectly, could actually do more harm than good.
Start with a clean skin
Cleanse your skin to remove the day’s dirt, grime, and bad vibes. Pat it dry with a clean towel because we’re all about that fresh canvas life.Oil up
Slather on a facial oil or serum. This isn’t just for the glow – it helps the Gua Sha glide across your skin like a figure skater on ice. Plus, your skin will soak up all that goodness. Hold it like you mean it
Grip your Gua Sha at a 15 to 30-degree angle, with the flat side almost hugging your skin. If it feels comfy, you’re doing it right.Neck first – because gravity’s a thing
Start from the base of your neck and glide upwards towards your jawline. Use gentle pressure – this isn’t a wrestling match. Repeat 3-5 times on each side. This helps with lymphatic drainage, which is just a fancy way of saying "goodbye, puffiness."Jawline & chin – time to get that definition
Starting at the centre of your chin, sweep the tool along your jawline toward your ear. Apply light to medium pressure, repeating 3-5 times per side. This one’s for those Insta-worthy jawlines.Cheekbones – lift, sculpt, and slay
Move from the side of your nose outwards to your ear, following the natural curve of your cheekbone. This step helps lift and sculpt, giving your cheeks that oh-so-satisfying contour. Repeat 3-5 times on each side.Under eyes – so delicate
For the tender under-eye area, go easy. Sweep from the inner corner of your eye out towards your temple (flat areas on the sides of your head, just behind your eyes and between your forehead and ears). This can help reduce puffiness and brighten things up – say goodbye to those bags!Forehead – smooth operator
Start at the centre of your forehead and sweep outwards to your temples. Or, go from your brows upwards to your hairline to smooth out any frown lines. Repeat each motion 3-5 times.Now, the other side
Repeat everything on the other side of your face for that perfectly symmetrical glow.Finish with a feel-good massage
Wrap things up with a gentle facial massage using your hands, because who doesn’t love a little extra relaxation?Clean up your act
After all that self-care, give your Gua Sha tool a good wash with warm water and mild soap. Dry it off and store it somewhere safe, ready for its next use.
🤷So, is Gua Sha worth all the fuss? If you’re looking for a quick fix to achieve perfect skin, you might want to manage your expectations. But if you’re in it for the long haul – enjoying the process, the relaxation, and those subtle yet satisfying results – then yes, Gua Sha might be just the one for you. A little slice of wellness you can incorporate into your daily routine.
So go ahead, give Gua Sha a go.
🤳Just don’t forget to take that selfie – because if it’s not on Instagram, did it even happen?


 Track Order


Leave a comment
All comments are moderated before being published.
This site is protected by hCaptcha and the hCaptcha Privacy Policy and Terms of Service apply.